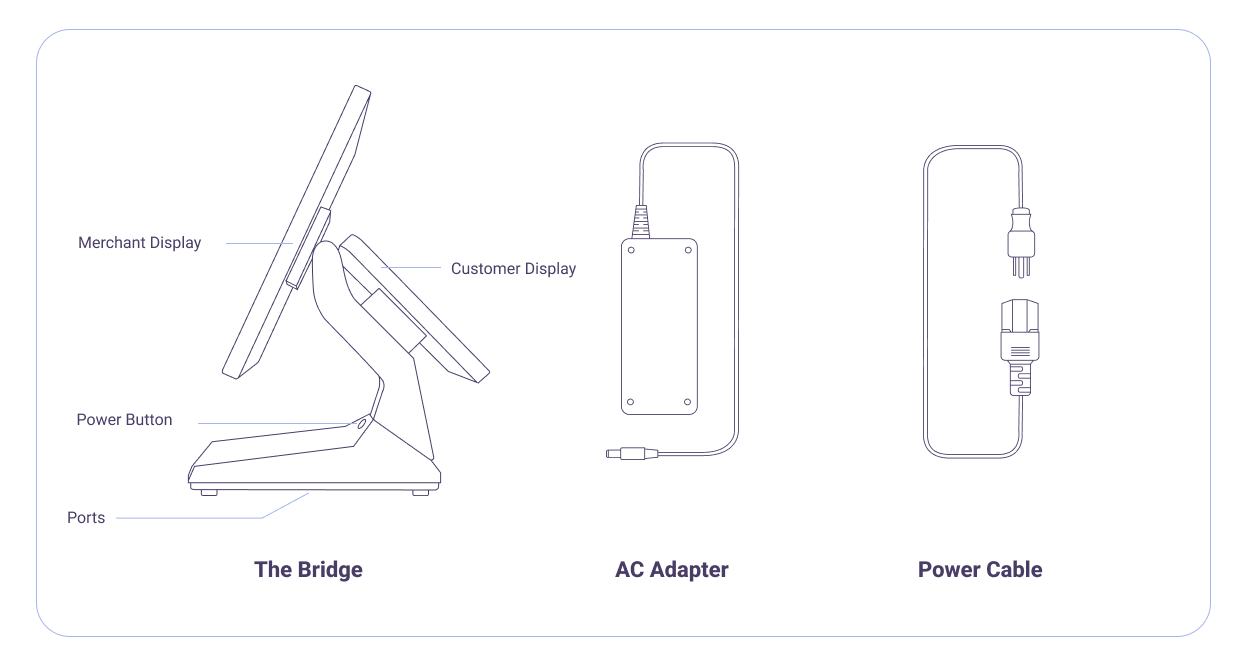
What’s in the box?
Let’s get your Bridge register up and running. Here’s what is included in your box:
Get Started
Welcome to your Bridge Smart Register, designed to deliver smooth checkout & payment experiences for both you and your customers, with crisp dual-sided displays and a sleek midnight aluminum finish that will fit right in on any countertop.
Before you begin
- Make sure you have a known working power source to plug your Bridge into
- If using network features, ensure your local network is ready to be connected via Wi-Fi or LAN
Initial Setup
- Insert the AC plug into the AC outlet according to the identifying input on the power adapter.
- Connect the Power Cable into the AC Power Adapter USB connector on the bottom of the console, then connect the AC Power Adapter into the wall outlet.
- Plug the Power Adapter into the round barrel pin port on the underside of the Bridge
- To turn on your Bridge, press and hold the round silver power button on the front of the Bridge base until the Bridge boots up and screens turn on.
- You will land on the home screen, where you can access your settings and launch your favourite POS apps to get started with your new checkout experience
- To power down your Bridge, simply hold the Power button for 3 seconds and press confirm when the dialog prompt appears on the screen.
The base sits on raised feet so any cables can be neatly managed and run in whichever direction is most convenient from the Bridge to any power or accessories.
Connect to Wi-Fi
To connect your Bridge to a wireless network and access the internet follow these steps:
- Make sure your wireless route is powered up and working properly
- Swipe up on the Bridge display
- Select Settings
- Select WLAN from the wireless and network menu
- Turn ON Wi-Fi (the top right button on screen)
- Select the wireless network you want to connect to
- Enter the Wi-Fi ipassword and select CONNECT
- You are now connected to Wi-Fi, and can download apps, perform updates, and use any other network functions
Note: The SSID wireless access point name and wireless security password is case sensitive and must exactly match the Wi-Fi network settings.
Connect to LAN (Ethernet)
To connect your Bridge to a wireless network and access the internet follow these steps:
- Plug LAN cable to the Ethernet port on the underside of the Bridge’s base
- Confirm the Ethernet icon appears at the top right of the Status bar
- You are now connected to the internet, and can use network features
Using Accessories
Connect any accessory to your Bridge register in a snap with the ports neatly concealed underneath the base.
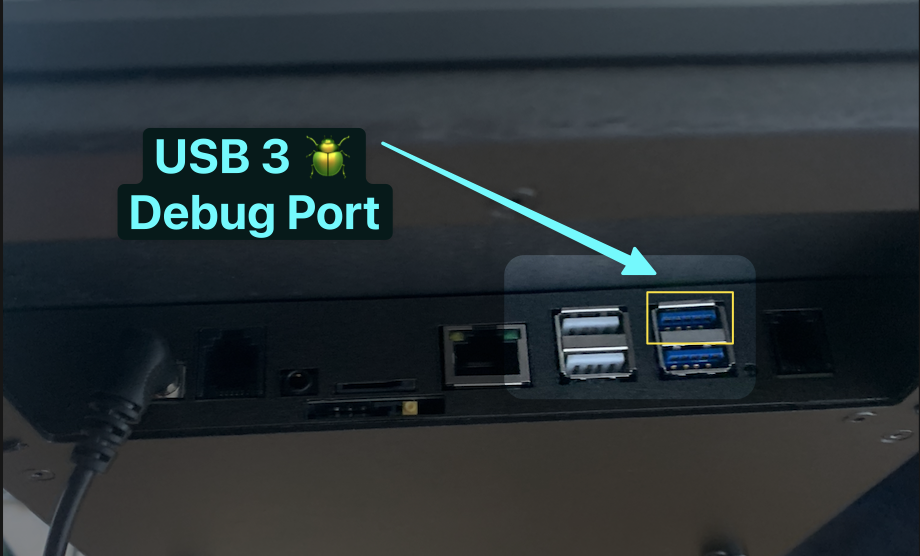
- Printers, scanners, and other USB accessories simply plug directly into the USB ports (marked 2.0 & 3.0)
- SD card scan be inserted directly into the SD/TF slot
- Cash drawers connect directly to the dedicated port, or can be hooked up through an attached external receipt printer